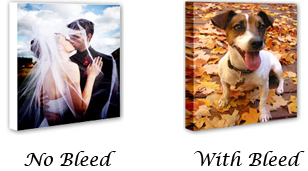
The term Bleed or “Gallery wrap” as it is known is simply when your image goes around the side of the wooden stretcher frame. There are two methods of adding Bleed to your photo. Method 1 is where the edge of the canvas frame is plain white and Method 2 is when the photo wraps around the edge of the frame.
The example below shows an image with no bleed (White Edge) and an image with bleed (Photo wraps around the sides).
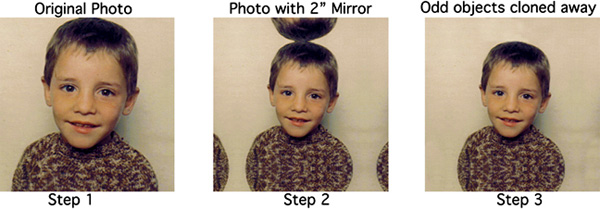
If you want bleed adding to your canvas prints and are worried you will loose some of your photo by choosing this method, do not despair. At Canvas Online, we take the last 2 inches of your photograph and mirror it over the edges so that you do not loose any of the picture from the front of the canvas print. Once we have mirrored the photo, we then "Clone and Edit" any odd looking shapes from the added bleed. A good example is shown below.
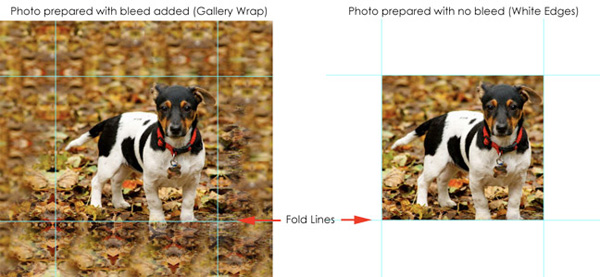
To fully demonstrate the difference between gallery wrap or no wrap we have prepared the same photo using both methods.
The photo on the left is the gallery wrap and you can see that none of the picture will be cut off as we have added to the image.
The photo on the right is a plain no bleed prepared image. The edges are simply left white and the photo sits on the front of the frame.
© 2025 CanvasOnline.co.uk | Premium Canvas Prints & Personalized Photo Gifts